Creating Your First Worldspace

From RPG Creation Kit
Jump to navigation Jump to search

In this article we are going to create a completely new worldspace that can be the starting point of your own world. We're also going to see how Exterior Worldspaces are structured and streamed.

You should have completed the Getting Started section before following this tutorial.

Introduction

As you may already know, a worldspace can be either an Interior Worldspace or an Exterior Worldspace.

Creating an Interior Worldspace is just a matter of creating the worldspace file and populating it with Interior Cells, you've learnt to do this in the Creating Your First Cell tutorial and is not a big deal.

Creating an Exterior worldspace however is where a little bit of work needs to be done in order to properly set the worldspace and its cells to be streamed as the player walks by, and that's what this article is going to cover. Luckily, we are going to use the cells generator that came with the update 1.6.1 that simplifies a lot the process.

Before going forward, I'd like to clarify one thing:

The RPG Creation Kit features a World Streaming system that allows you to split your massive world in chunks and have them loaded only when strictly required, this is one of many ways to stream a large map, and if you'd like to roll on your own solution where you have just one massive terrain and stream on top of that, you can totally do that. In this case, you just need to create an Exterior Worldspace with just one Cell that represents your whole world, it will be then your streaming system that will make the streaming happen.

Anyways, the RCK World Streaming is the recommended way of doing it.

How do Exterior Worldspaces Work?

Before going on I'd like to explain how the Exterior Worldspace and the World Streaming works.

At any given time, there are at most 3x3 cells fully-loaded while the player is in an Exterior Worldspace. With fully-loaded, I mean that the whole scene is loaded, with all the AI, Doors, Paths and everything else present in the Cell's scene.

The way the 9 cells are selected and loaded is simple: from the position of the player load the cell the player is in and the 8 neighbor cells.

Prior to the Update 1.5, the player could only see that portion of the world, and terrains would pop-up as the player would change his center cell. With the Distant Cell Rendering we are able to keep the fully-loaded number of cells the same (9), but we can use a distant cell representation to avoid having the rest of the world empty while not loading too much data.

So, there are two types of data we use to represent an exterior worldspace:

  • Actual Cell: is the scene you originally create, with all the content inside such as the AI.
  • Distant Cell: is a prefab that represents a low resolution version of the Actual Cell, without expensive objects such as the AI. Distant Cells however allows objects to be seen from far away (like a big building).

When the 9 Actual Cells are loaded, they are surrounded by Distant Cells like in the image below:

Fws 2.png


The player is the red dot at the center, while the highlighted terrain in orange is a fully-loaded cell. For what we said above, the cell the player's in is fully-loaded, and so are the 8 Neighbors (like the highlighted one) and If you look closely, you can clearly see the edge that separates the distant cells from the fully loaded ones.

What's important to note is that when the player enters a new cell, this 3x3 grid of terrains gets shifted to make that the center of the grid is the cell the player has just entered, therefore 3 cells are unloaded, and 3 new cells are fully-loaded, look at the GIF below:

Worldstream.gif

GIF, click on the image to view it.

The player is the transform that moves in the direction of the blue line. He starts in the cell at the center (whose boundaries are very close to the city). When he moves downward, you can clearly see the fully-loaded cells shifting towards the direction the player is moving. You can even see details appearing such as water in the lake and bridge and house near it.

When that happens it means that the player has moved to another cell, therefore, we should adjust the 9 terrains fully loaded to make that the player is at the center of the 3x3 grid.

When the 3 terrains located at the top are unloaded, they are replaced by the Distant Cell representation of them.

And that's pretty much it, luckily for us, the Distant Cells are auto-generated. We'll do that later.

Creating the Worldspace File

The New Worldspace file.

Let's return to creating our own worldspace.

The first step is to create your new Worldspace file.

Select a folder you'll put all the stuff we're going to create for the new world and right click in the Project Window:

Create->RPG Creation Kit->Cell System->New Worldspace

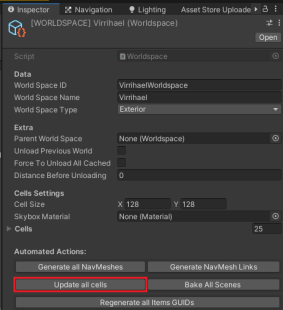
A new Worldspace file will be created, rename it to something like "[WORLDSPACE] MyNewWorldspace" and let's configure it in the Inspector straight away: setting the Worldspace ID, Worldspace Name, Type and Cell Size is all you need to do for now.

Take a moment to pick the Cell Size, this is the size of one chunk of the world (a single terrain). All terrains will need to have the same size in order to be properly connected and streamed, depending on your goals and target hardware, you may have to pick a different Cell Size.

The recommended value is (128, 128), keep in mind that this does not affect the distance the player will be able to see terrains (for what we've seen in the section above), but the distance where the cell will be fully loaded.

I recommend experimenting with different sizes before settling in with a particular size and build your world on top of that.

Auto-generating the Worldspace

Once we have our Worldspace file, we can auto-generate the world.

The process is very easy and allows us to lay as many terrains as we need.

Open the Worldspace Generator in the Toolbar above: RPG Creation Kit->Cells System->Worldspace Generator:

Fwsp 1.png


This will bring up the Worldspace Generator window.

Assign the worldspace file we've just created above and the interface will fill as follows:

Fwsp 2.png

Here are the settings explained:

  • Worldspace To Generate: the worldspace for which we are generating cells.
  • X (start, end) - Y (start, end): the coordinates (start, end) of the cells we are going to create. By default it's the square (-2, 2) that generates 25 cells in all directions (that's why it starts negative). You should keep this value even, like (-3, 3), (-4, 4) and the same for X and Y.
  • Terrain Preset: is the default terrain the auto-generated cells will have. It should be flat, so that the whole world will be connected correctly. You will be able to raise/lower the terrains later.
  • Starting Cell ID: The starting string of the CellID the Cells will have, like the first cell that will be generated will have as ID MyNewWorldCell(-2,-2)
  • Output path: the location in your project where the generated files will go.


Set the values as you want, although I'd suggest keep them as default if it's the first time you're working with exterior worldspaces, then click Autogenerate to start the process.

When it will finish, you'll have your worldspace created. You can view it in the Cell View and load any cell you want.

Fswsp 1.png

Before doing anything else, you need to Update the Databases, to do that, click on the toolbar "RPG Creation Kit -> Update all Databases".

Then, we should auto-generate the Navmeshes and Navmesh Links, to do that, click on the Worldspace File we've create earlier and in the Inspector click first on "Generate all Navmeshes" and when the process is over click on "Generate NavMesh Links":

Fswsp 2.png

And that's it! Your worldspace is ready. You can start creating your world.

Try setting it as the starting point of a new savegame following this tutorial:


And then create a new savegame to load in the new worldspace.

Generating the Distant Cells

As you walk through the worldspace, you will notice terrain pop-up, and if you placed 3D models in your cells you wish to be seen from anywhere, they won't be visible. this is because we've not generated the Distant Cells yet.

For the purpose of this tutorial, let's add a big 3D model into a Cell that we may want to make it visible from any part of the world. I'll add the prefab "church" inside the cell "MyNewWorldCell(2,2)".

The key thing here is that in order to make 3D models visible from anywhere, we need to add a "Distant Object Tag" component to them. When the Distant Cells will be auto-generated, the objects with the "Distant Object Tag" component will be included in the Distant Cell representation. These are referred as "Distant Objects".

Cfwp 1.png

It's also a highly recommended to implement Level of Detail (LOD) models for distant objects. These lightweight versions of the model will be displayed based on the player's distance, optimizing performance.

Save the modified Cells and let's auto generate the distant terrains:

Open the Distant Cell Rendering in the Toolbar above: RPG Creation Kit->Distant Cell Rendering:

Cfwp 2.png

Here are the settings explained:

  • Mode: allows you to select individual scenes or import them from a Worldspace.
  • Add From Worldspace: allows you to assign a worldspace and clicking "Add scenes" will add all the scenes of that worldspace to "Scenes To Render".
  • Terrain Preset: contains a prefab to a Terrain whose settings will be inherited by the generated Distant Cells Terrains.
  • Auto-Set object in Cell: if it is true it sets automatically the generated terrains to the respective cells.
  • Scenes To Render: displays all the scenes for which we're generating Distant Cell Terrains.
  • Output path: is the path the distant terrains will be save to. You need to create this path before running the generation.

Note that when running the generation of distant terrains multiple times in the same folder, the older DISTANT_ terrains will not be deleted.

With the settings as above, click on "GENERATE FOR ALL".

Once that is done, the folder specified as Output path will contain all the terrains, and if you've set "Auto-Set object in Cell" the distant terrains will be assigned. Load in the game and you see that the whole world is visible, in addition to that, you will be able to see the Church from any point in the world:

Fwsp 3.png

Adding new Cells later

If you've misjudged the number of Cells you need for your world, you can always Add a New Cell to an Existing Worldspace.

Although the process is manual. If you've misjudged by a lot and need a lot more cells, consider creating a bigger new empty worldspace and import your previous cells there.