Creating A New Consequence
Consequences are one of the many useful elements of the RPG Creation Kit, although everything (and more) that can be done with consequence can be done with Scripting as well, Consequences represents a useful alternative to do rapidly build and test some things.
There are many built-in useful consequences, but you may need your own, in this article we're going to see how we can create a new Consequence that will allow us to spawn an Item In World at certain coordinates, having this new consequence callable from any elements the Events & Consequences support.
Just a note, setting up a new consequence is not trivial nor hard, but you should think twice before doing that, Consequences are for very general calls or functions that you should be sure will be called extensively and with many different parameters (like the "Alert Message" consequence), if you want to make a functionality that is probably going to be called just once or a bunch of times, you should make a Script for that, as it is way easier to make and setup than a consequence is.
Defining the New Consequence
The first thing to do is to define the new Consequence, we have to do that in the "Consequence.cs" script.
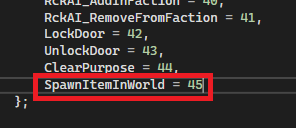
Reach the enum "Consequences Types" and add at the bottom your new consequence:
That will acknowledge that the consequence exists, next, we should define the data that you will need to insert upon configuring the new consequence, in my case, I will have:
- itemToSpawn (type: Item).
- itemPos (type: Vector3).
- itemRot (type: Vector3).
And the list may go on, you may want to add the Item ID, configure the Amount of items the instantiated Item In World will have, and so on and so forth, for this example, I will limit to these three things, but you can do as you want.
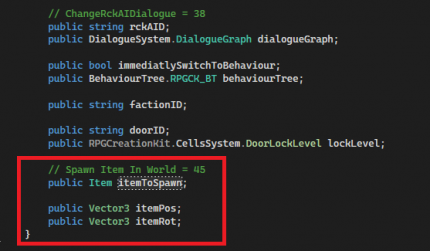
The Data is defined in the public class Consequence, near the bottom of the script, so reach it and let's add said data at the bottom of the class:
You may have noticed inside this class that all the data you're prompted to set when configuring consequences is declared here, you may also have noticed that there are already definitions for types Item and Vector3, and we've essentially added something that was already there, but with a different name.
I want to make a note here, if some property with of a type is already defined in the Consequence class, and you need that type for your new consequence data, you should probably use the existing one instead of creating a new property. This is because in C# unassigned properties still takes memory when an instance of a Class is created, and you could easily bloat the Consequence class if you decide to create a lot of new consequences. For example, I could have used the already defined: public Vector3 coordinates and public Item itemInInventory and spared few bytes. In that case, I would only have had to create an extra Vector3 for the rotation (because we need two vectors to configure at the same time). However, this should not be an issue until it becomes an issue, if you add your new fields for each consequence you are going to make you'd probably be fine, still, it was worth mentioning it as I also did that for some of the built-in consequences. For this article, I'm going to keep things as they are and keep the new properties we've just added.
Once we did that, we are going to make them appear in the Consequence editors.
Drawing the Consequence in the Editor
Drawing the consequence in the editor is accomplished by a custom PropertyDrawer, named "ConsequenceEditor", open the file "ConsequenceEditor.cs" and follow along.
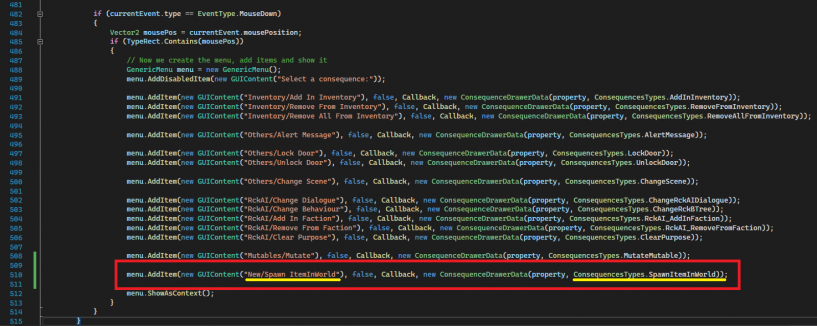
The first thing we're going to do is adding the consequence to the menu you use to select which consequence you want to add, for doing that, reach around line 483 and look for the code that adds a GenericMenu and many new items, you will probably recognize these.
Let's add at the bottom our new consequence, remember to edit the highlighted parts in yellow:
Save the script and reach for any element that implements the Events, you will see that if you try to add a consequence now, both your New category and Spawn ItemInWorld will appear and be selectable.
However, if selected, it will show no data because we have to define what needs to be drawn in case this consequence is selected.
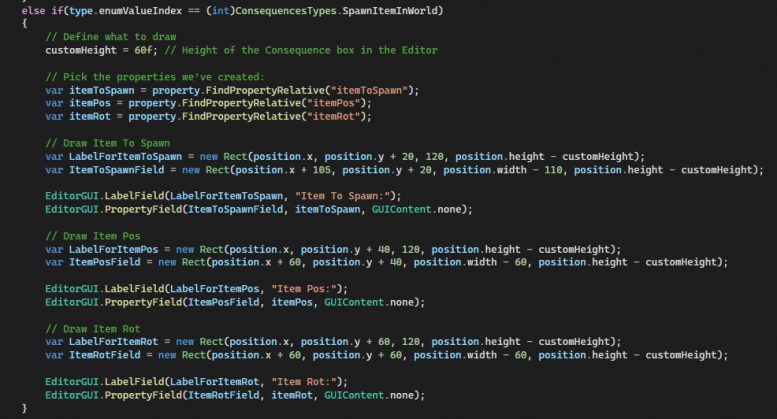
We do that in the OnGUI() method on the "ConsequenceEditor.cs" script, if you take a quick look at it, you may be able to figure out what is going on, reach for the bottom of the if(...) else if(...) chain, around line 454 and let's add a new case that will cover if our new consequence is selected:
From this point, I'm literally going to copy-paste the code just above what I've added and make the EditorGUI draw my new properties, if you have trouble understanding that, this will help you: Unity - Scripting API: PropertyDrawer (unity3d.com)
Tip: if you need more than 3 values to be shown in the Consequence Box in the Editor, adjust the customHeight to be greater than the set 60f.
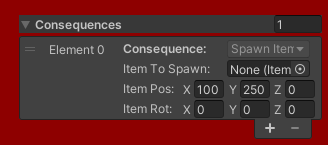
Once you've done that, the Consequence editor will be setup:
However, executing this consequence will do nothing, as we've not defined what needs to be done with this data when this consequence is triggered.
Define the Execution of the Consequence
Do define what a a consequence actually does, we have to open the "ConsequenceManager.cs" file.
This script has a method named "ApplyConsequence()" that defines the execution commands for each consequence present in the RPG Creation Kit, I invite you to check some, you may notice that many of them are just calls to the RCKFunctions static script.
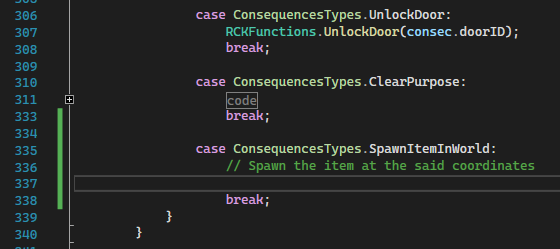
Let's define our execution commands for our new consequence, we can do that inside the "ApplyConsequence()", reach the bottom of the switch case and let's add our new case:
All we have to do is to instantiate a new GameObject, set a random GUID for the ItemInWorld component and move it to the defined coordinates.
We can access the properties we've edited in the Consequence Editor by accessing the "consec" field in that block of code, so "consec.itemToSpawn" will give us the item we've inserted in the editor, while "consec.itemPos" and "consec.itemRot" the position and rotation defined.
This will be more than enough:
Save your scripts and test it, now anytime, anywhere this consequence will be called it will spawn us a new Item In World for the player to pickup.
Conclusions
Consequences are an extremely powerful tool at your disposal and being able to create them for actions you know you will perform many times will definitely accelerate your workflow, although they require some C# knowledge to setup and a bit of more effort than a simple script.
