NPCs Creation
In this tutorial, that comes after A First Look, Part 1 and A First Look, Part 2 we will see how we can add NPCs in the RPG Creation Kit and how they exist in the project.
The process is very easy and straightforward, so let's get right into it.
NPCs as Prefabs
In the RPG Creation Kit, NPCs exists as prefabs inside your project. To have NPCs inside your cells, you may place those prefabs directly in the corresponding scenes or you may instantiate them at runtime.
Unless for specific reasons (as we've seen for the Thief in the previous tutorial) you should always place them while composing your scenes.
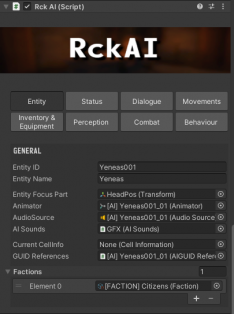
If you have an NPC inside your scene, you're able to assign more settings to him by using the Inspector, as compared to the Rck AI Editor Nevertheless, if you are going to modify something that is present inside the Rck AI Editor, you should always do it from there, as it will edit the Prefab and not the instance you have in the scene.
Before going foward, focus on the Cell View and open the scene "Virrihael(0,-2)", we are going to place the NPC by the lake and make him sit on the chair that's there.
Creating the NPC
If you want to create a new NPC, you are always going to use the Rck AI Editor. You can open it by clicking on the top-menu "RPG Creation Kit -> Rck AI Editor".
There are two ways you can create an NPC, from scratch or by duplicating an existing NPC. We are going to create him from scratch.
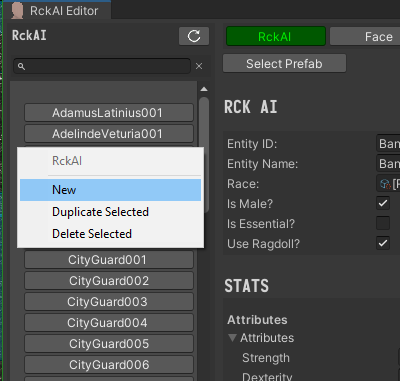
Right click in the left-list, while not hoovering on a button, and select "New":
This will add a new element in the list at the very top of it, named "_New_RckAI". Click on it and let's configure it.
Select the Entity ID, which is the ID of this NPC and pick a name for him.
I'll have:
ID: Uriel001
Name: Uriel
If you're wondering why I always add '001' at the end of every ID, it's because of two things, the first one is that If I look at it I can instantly tell it is an ID, the second thing is that during the creation of your game you may have variations of the same NPC, as it happens for "Ryan" in the Demo. So you can differentiate versions of NPCs with the number '001', '002'...
Next, pick the Race, at this point you should only have one, unless you created new races. Select "Human" and take a look at the window.
I'm, gonna leave the "IsMale" cheked since my NPC will be a male, the rest is really upon to you, see the explaination for each field in the Rck AI Editor article.
I'll leave everything untouched and switch to the "Face" tab, where I'll edit his face and select Hair and Eyes for him.
Next, in the "Inventory" tab you'll pick all the items you want this NPC to carry, and if he dies, to loot on his body.
You'll notice that the arrow ![]() will appear right to every item, the arrow is used to make the NPC equip the selected item, that will be present also in the "Equipped Items" list. You should only equip ARMOR and Weapons, and have only one weapon an armor piece equipped at time, other situations, such has having 2 sword in the Equipped list, have an undefined behaviour.
will appear right to every item, the arrow is used to make the NPC equip the selected item, that will be present also in the "Equipped Items" list. You should only equip ARMOR and Weapons, and have only one weapon an armor piece equipped at time, other situations, such has having 2 sword in the Equipped list, have an undefined behaviour.

