Creating a New Race
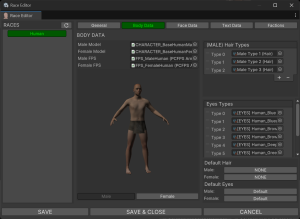
In this tutorial we'll discuss an important topic you sooner or later will want to face when working with the RPG Creation Kit, which is Races.
A Race is essentially a complex humanoid 3D Model that acts as a base for your humanoid characters. Races define:
- Basemesh: the actual 3D Model.
- Eye Colors: set of materials you can use to make your characters eye color different.
- Hair Types: set of 3D Models you can use as hair for your characters.
- Blendshapes: used to deform the basemesh and create different characters.
You want to use a Race when you want the Player Character to be able to use a specific 3D model, or you want an RckAI to have all the functionality the player has like the Equipment System and Character Customization.
For AI that is simpler, meaning they don't need customization, hair or blendshapes, like normal creatures, you should use Creature AI.
A Race define both a Male and Female version of that Race, but you can also just create one of them and leaving the other blank if you only need one gender.
Premises
Before we start, as the current RPG Creation Kit Version 1.9, you can create as many Races as you want. However, in order to make sure the Equipment System works correctly you need to follow two strict rules:
- All 3D Character Model has to use the same rig.
- The 3D Character Model mesh has to be split in:
- Head
- Torso
- Arms
- Hands
- Legs
- Feet
This is very important, and missing this step will result in your Race probably being playable and usable, but the Equipment system will not work with it correctly.
I recommend to either use the same rig as the Human race we use in the RCK, or to start from scratch by using one of your rig and sticking with it for all of your characters. Bear in mind that also the equipment models themselves have to use the same rig, as we've seen in the Creating a New Armor Item tutorial. If you haven't read that tutorial yet I strongly recommend doing it now before proceeding, and to try to create an equipment Item for the RCK default character before attempting to create a new Race.
In this tutorial I will use a generic 3D Model, with his own rig and with the mesh that is in one piece, so we will see all the steps in order to convert it in a RCK-friendly model. I will use the RCK default character's rig, so I'll need to convert the new 3D Model to be able to use that rig. I'll also use Blender, although if you're familiar with another software the steps should be pretty similar.
First thing I'll need is the RPG Creation Kit Basemeshes's Rig, that you can find at this link.
Step 1: T-Pose, A-Pose?
The first problem you may stumble upon is the following: your rig is in A-Pose, but your character is in T-Pose (or vice-versa). Also, you may have both your rig in T-Pose or A-Pose, but they may be a little bit different.
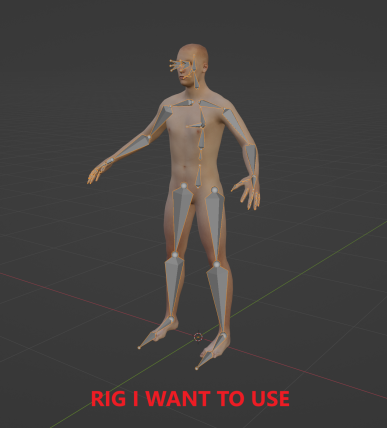
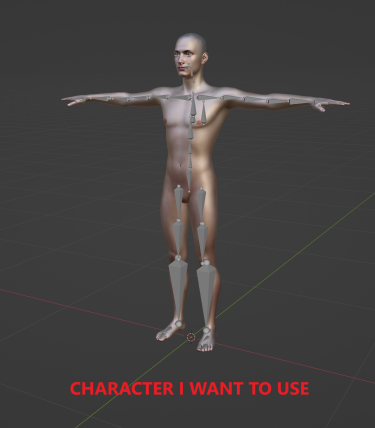
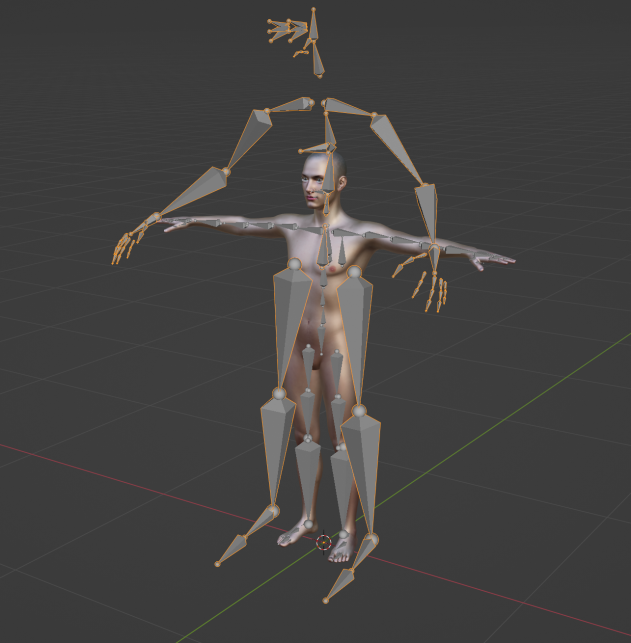
In my case the 3D Model I'm using is in T-Pose, and the rig I want to use is in A-Pose:
As you can see, the rigs are quite different, and the resting pose is as well. This is probably your case too, and it will be the case for every Race you'll want to setup. So the first step is to convert the resting pose of the character to match the rig I want to use.
Open your new 3D Model character in Blender and let's append the Rig from the RCK Human basemeshes.
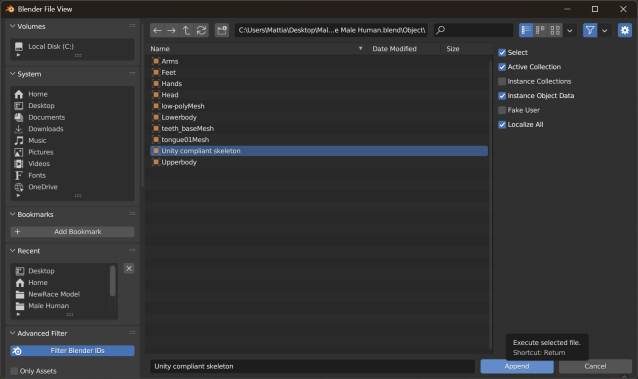
Click on File->Append, then locate the "Base Male Human.blend" file and click on it. Go in the 'Objects' folder and click on "Unity compliant skeleton". Then, click on the blue Append button:
You will import only the rig, which is what we're looking for, and you'll be presented with a situation similar to this:
Now, depending on your 3D Character model, the rig may be bigger or smaller, the point is this: while in object mode we need to scale the original character rig in order to match in size with the RCK rig we want to use. A good measure is the eyes bones, make them match with your character:
As you can see here, the eyes bone matches with the character, which means the size is correct, and I've also rendered the original rig as black sticks instead of octahedral. This will come handy soon.
Once you did this, make sure to click on the character's rig we've just resized and Apply All Transforms by clicking CTRL-A -> Apply All Transforms (while in Object Mode).
Now, the objective is to set the resting position of our model such that it matches the A-Pose rig we want to use.
So now what you need to do select the original character rig (drawn as sticks) and go into pose mode, then, you'll have to move the bones until they match the rig we want to use (now the only one drawn as octahedral).
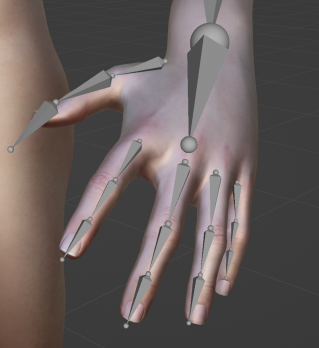
You should both rotate and move the bones (by pressing G) in order to achieve a correct alignment, especially for the hands and fingers. Do not be afraid to stretch the model if it's needed.
My advice is to work on only one side of the character and then mirror the pose for the other side. You can also use 'X-Axis Mirror' which is super useful.
Apply extra patience to align the fingers of the hand, it's a process you only have to do once and if it's done poorly it will have its consequences later.
During my process, I found out that it's better to align the spine and chest first, then the legs and at the very end the arms and hands.
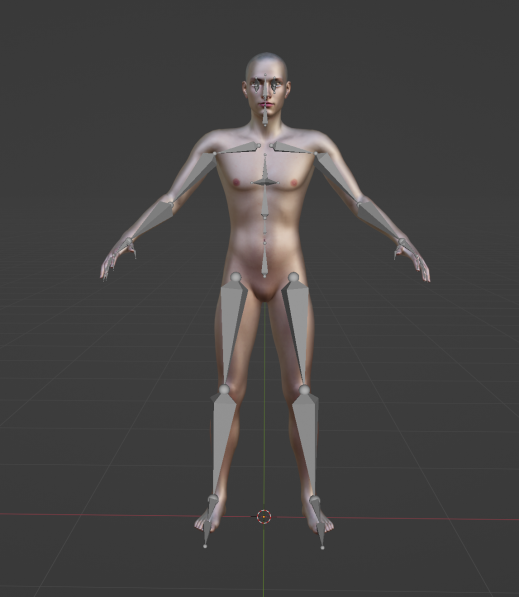
Anyways, here's my finished result:
Now for the last thing to do is to apply the original armature, in order to set this pose as the model rest pose.
Select your mesh and in the modifiers window apply the armature modifier (of the original rig).
Now we can delete the original rig, nothing should break and the 3d model should keep this pose we've just made.
Last thing is to parent the new rig with the mesh, click on the mesh first, then shift select the armature and press CTRL+P, "With Automatic Weight" should give a good enough result, which you can always modify later.
The hardest and maybe the most annoying part is done!
Step 2: Splitting the Mesh
Now we will split the mesh in the 6 sections I've mentioned before:
- Head
- Torso
- Arms
- Hands
- Legs
- Feet
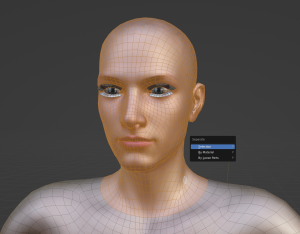
You can very easily do that by going in Edit mode, selecting the vertices of each section, and then click 'P' to separate. Select Separate By Selection.
Repeat this process for every part, you can use the RCK basemeshes as reference for the split points.
