Difference between revisions of "Your First Quest"
| Line 69: | Line 69: | ||
Click again on "Show/Hide" to make the Node occupy less space, | Click again on "Show/Hide" to make the Node occupy less space, | ||
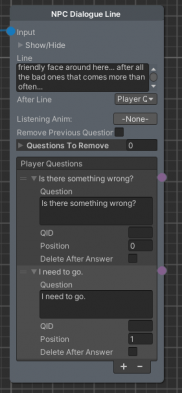
[[File:Dil 2.png|thumb|393x393px|The first NPC Dialogue Line settings.]] | |||
What should happen next is that the Player will have to say something, for doing that we can use the '''After Line''' of the NPC Dialogue Line node, click on it and select "Player Questions". | |||
More settings will appear, we can ignore everything for now and jump to the "Player Questions" list, click on the '''+''' button two times to add two things the Player will be able to say. | |||
You'll notice that ''Elements'' will appear in the list with a violet dot right to them. | |||
Let's open '''Element 0''' by clicking on it. | |||
Here you can configure what you want to say and how questions should appear in the UI. For Element 0 I'll have as question "''Is there something wrong?''" and it will have the '''Position 0''', that means it will always be on the top of the Dialogue Interface. | |||
For Element 1, the Question will be "I need to go" and the position will be '''1'''. | |||
The checkbox "Delete After Answer" is used for deleting the question from the current dialogue interaction after it has been selected, it is not needed for now. | |||
Perfect, what we need to do now is to tie those things the Player says to responses of the NPC and change of state. | |||
Revision as of 15:20, 3 March 2022
In this tutorial we will use NPC we've created in the NPCs Creation and the Cell we've created in the Creating your First Cell tutorial to create a fairly simple quest step by step.
Designing the quest
The first thing that we are going to do before actually doing anything is to design the quest. It is a good idea to think about the quest you want to make, the stages and how it should proceed before you actually start implement anything.
In this tutorial our quest is titled "To Break The Quiet", and it will go this way:
We'll encounter Uriel, the NPC we've created in the previous tutorial sitting peacefully outside his shack. If the Player goes and talk to him he will ask for our help. He will say that there are some bandits that are bothering him and stealing in his house, and that shortly they will come back. If the Player accepts the quest, as soon as the dialogue ends two bandits will arrive from behind his shack and demand golds. Uriel will not bow to their request and start a fight.
The quest can then end with Uriel dead or alive, depending on how the fight goes. If he'll stil be alive before the bandits die, he will give us some of his gold, otherwise the quest will end with a failed objective.
Creating the skeleton of the Quest
Let's go ahead and start developing our quest. The first thing you have to do is to organize your project, create a folder and name it "To Break The Quiet", we'll insert everything related to this quest inside this folder.
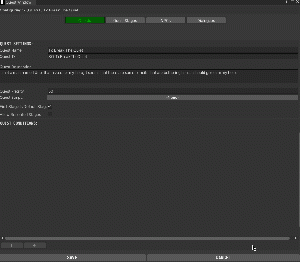
Go ahead and create a New Quest by right clicking in the project window -> Create -> RPG Creation Kit -> Quests -> New Quest and name it "- [QUEST] To Break The Quiet", then open it in the Quest Window by clicking "Configure Quest" in the Inspector.
Set the name, ID and description of the quest, I'll have:
Quest Name: To Break The Quiet
Quest ID: SQ_ToBreakTheQuiet
Quest Description: I met a man named Uriel that asked for my help, it seems that there are some bandits that are bothering him... I should give him my help.
We don't need to move anything else for now, switch to the "Quest Stages" tab and right click in the list on the left, then click "New" to create a new Quest Stage. Insert the ID of this stage to be 10 and now we have to configure the Quest Stage on the right.
The description will be: Learn more about the Bandits that are bothering Uriel, and I will also check Display Log Entry, because I want this Description to show up on the screen.
Then go ahead and create a new Quest Stage, it will have as ID 20 and the description will state: Protect Uriel from the Bandits. I'll still have checked the Display Log Entry because it is an objective I want the Player to see.
Create another stage, Stage 30 and set its description to be: Speak to Uriel to collect your reward, again, this will have Display Log Entry set on true. This one will have the checkbox Complete Quest set to true, since when this stage will be completed, the quest will end.
Now if we analyze those three stages, when played sequentially they describe exactly our quest. The only thing that misses is the other ending we've explained, the one where Uriel dies. To achieve this, we are going to create a new Quest Stage, Stage 40 that will have as description "# This stage is completed if Uriel dies", it will have Complete Quest set to true, and Display Log Entry set to false.
This is because if Uriel dies, this quest stage 40 will be triggered immediatly, the Description will be hidden from the Player and the quest will end.
Implementation - Stage 10
The first thing that we are going to build for this quest, is Uriel's Default Dialogue, more specifically, this is the dialogue that Uriel will have as soon as he gets instantiated, and the first that will run if the Player speaks to him.
Create a new folder inside the previous one named "To Break The Quiet" and create a new Dialogue by right clicking in the project window -> Create -> RPG Creation Kit -> Dialogues -> New Dialogue Graph.
An empty Window will open, close it for now and let's rename the file to "[DIALOGUE] UrielsDefaultDialogue". In the Inspector we have to insert an ID for this dialogue that must be unique and not shared with any other ID. I'll insert "DIALOGUE_UrielsDefaultDialogue".
Now you can double-click on the file or click "Edit Graph" from the Inspector to reopen the Dialogue Window and start making the dialogue.
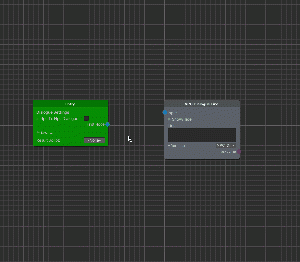
We've seen how Dialogues work in the previous tutorials, every Dialogue must start with an Entry Node, so let's add it.
Right click anywhere in the Window -> Dialogue System -> Entry, and a new Entry node will appear. We don't need further action for it, so let's go ahead and keep creating our Dialogue.
I want Uriel to greet the Player as soon as the Dialogue start, and then ask for help. We can have the NPC saying a line with the "NPC Dialogue Line" node, so let's add it. Right click anywhere in the Window -> Dialogue System -> NPC Dialogue Line.
That will add the node inside the Graph, now to make this NPC Dialogue Line the first thing that happens when the Dialogue starts, we need to connect the First Node of the Entry to the Input of the NPC Dialogue Node. You can do this by clicking and holding on the blue "First Node" dot and dragging the line to the blue dot "Input".
Now what we need to do is to fill the information inside the "NPC Dialogue Line" node.
The only thing that is currently displayed is the "Line", which represents the text that will be displayed to the Player while the NPC speaks this line.
So let's fill it, I'll write inside:
"Hail stranger, it's good to see a friendly face around here... after all the bad ones that comes more than often..."
Now you can click on "Show/Hide" to unveil hidden settings.
You can ignore most of the things for now, the "Plain Line" will be set to false since we want this dialogue to stop the Player and use the full interface, it will trigger no Events. You may just want to set the "Line Time", which is the time in seconds that will pass before this line is considered spoken.
Click again on "Show/Hide" to make the Node occupy less space,
What should happen next is that the Player will have to say something, for doing that we can use the After Line of the NPC Dialogue Line node, click on it and select "Player Questions".
More settings will appear, we can ignore everything for now and jump to the "Player Questions" list, click on the + button two times to add two things the Player will be able to say.
You'll notice that Elements will appear in the list with a violet dot right to them.
Let's open Element 0 by clicking on it.
Here you can configure what you want to say and how questions should appear in the UI. For Element 0 I'll have as question "Is there something wrong?" and it will have the Position 0, that means it will always be on the top of the Dialogue Interface.
For Element 1, the Question will be "I need to go" and the position will be 1.
The checkbox "Delete After Answer" is used for deleting the question from the current dialogue interaction after it has been selected, it is not needed for now.
Perfect, what we need to do now is to tie those things the Player says to responses of the NPC and change of state.


